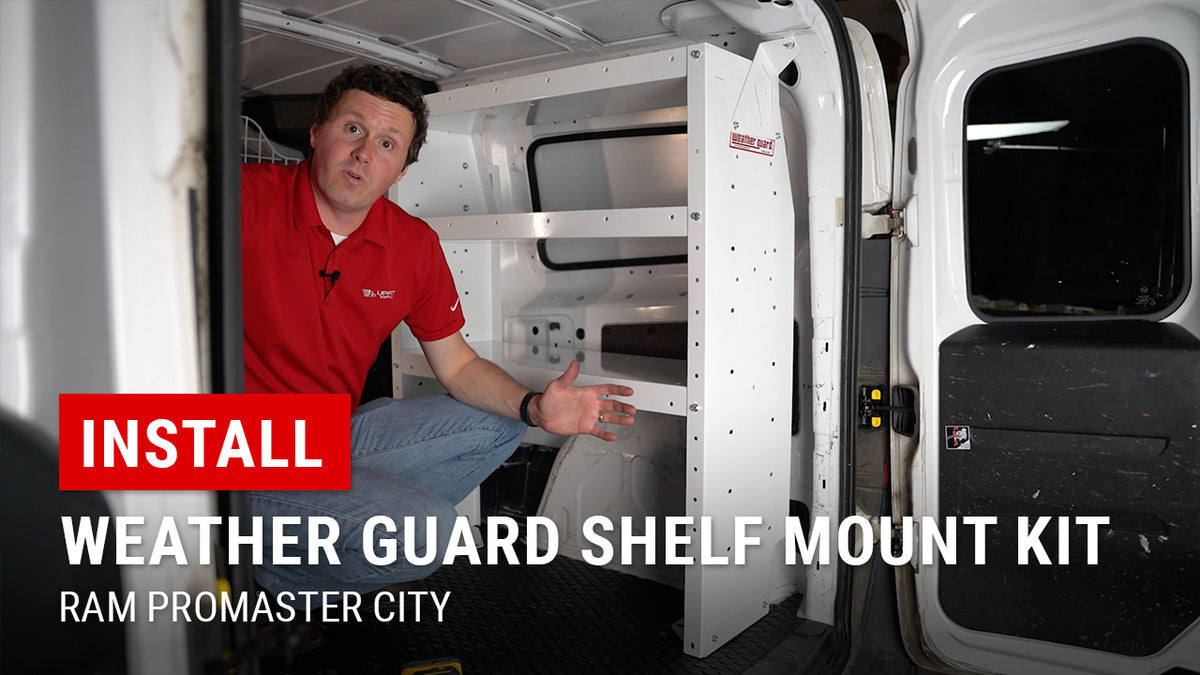
Installing a Weather Guard Shelf in RAM ProMaster City
|
Posted in Install Videos
Installing a Weather Guard Shelf in the RAM ProMaster City is a smart way to take your van’s organization to the next level. This heavy-duty upgrade helps pros stay efficient on the job by making tools and supplies easier to access and store securely. In this guide, we’ll take you step-by-step through the install—from surface prep and plus-nut setting to final torque. Along the way, you’ll take advantage of key features like heavy-gauge steel construction, an integrated mounting kit, and tool-ready dividers built for real-world use.
Why Installing a Weather Guard Shelf in RAM ProMaster City Matters
First, loose tools in transit pose a safety risk. Moreover, generic racks lack proper fit and strength. Therefore, Installing a Weather Guard Shelf in RAM ProMaster City provides:
-
Vehicle-Specific Brackets: No drilling through sheet metal.
-
14-Gauge Steel Construction: Handles daily tool loads.
-
Custom Width: 36″ shelf spans the ProMaster City’s rear.
-
Adjustable Dividers: Create dedicated tool zones instantly.
Consequently, your van stays organized, secure, and ready for any job.
Tools Needed for Installing a Weather Guard Shelf in RAM ProMaster City
Before you begin Installing a Weather Guard Shelf in RAM ProMaster City, gather:
-
Socket wrench with metric and SAE sockets
-
T40 Torx bit for D-ring removal
-
9/16″ wrench for plus-nut installation
-
Impact driver or ratchet for speed
-
Rubber mallet to seat plus-nuts
-
Work gloves to protect your hands
Meanwhile, park on level ground and clear the cargo area. This prep ensures a smooth install.
Removing Factory Floor and D-Rings
First, clear your cargo floor:
-
Unbolt D-rings: Use a T40 Torx bit to remove four floor anchors.
-
Pop floor mat (if installed): Slide out any rubber or carpet liner.
-
Inspect studs: Clean and free each D-ring bolt for reuse.
Afterwards, you’ll have unobstructed access for mounting brackets.
Step-by-Step: Installing a Weather Guard Shelf in RAM ProMaster City
Now for the main event. Follow these steps to complete Installing a Weather Guard Shelf:
-
Set Plus-Nuts:
- Thread supplied plus-nut onto the adapter tool.
- Insert into each pre-drilled hole on the cargo side header.
- Tighten until the anchor wings flare.
- Remove tool, leaving a secure M6 thread in the sheet metal.
- Thread supplied plus-nut onto the adapter tool.
-
Mount Floor Brackets:
- Align foot brackets over D-ring bolt holes.
- Use M8 bolts (supplied) to fasten into floor studs.
- Leave hardware loose for later shelf alignment.
- Align foot brackets over D-ring bolt holes.
-
Attach Shelf-Side Brackets:
- Bolt three upper brackets to shelf’s back panel using 10 mm bolts.
- Position front brackets on shelf’s face in designated slots.
- Bolt three upper brackets to shelf’s back panel using 10 mm bolts.
-
Seat Shelf Unit:
- With help, place the assembled shelf into van corner.
- Engage top brackets into plus-nut threads.
- Bolt M6 screws through brackets into header studs.
- Push rear shelf feet over floor brackets.
- With help, place the assembled shelf into van corner.
-
Level & Center:
- Slide shelf left-to-right for perfect fit.
- Measure equal clearance from wheel well to shelf edge.
- Torque all shelf-side and floor-foot bolts to spec.
- Slide shelf left-to-right for perfect fit.
Moreover, the precision-cut design makes assembly intuitive and error-proof.
Final Adjustments After Installing a Weather Guard Shelf in RAM ProMaster City
Once your shelf is mounted:
-
Verify Stability: Rock shelf gently to confirm rigid fit.
-
Align Dividers: Snap dividers into square slots for tool separation.
-
Check Access: Open the rear door fully to ensure no contact.
-
Load Tools: Place gear in designated compartments, using anti-rattle loops.
Finally, enjoy the scratch-resistant finish and easy-access layout every day.
Maintenance Tips for Your Weather Guard Shelf
To keep your shelf in top form:
-
Quarterly Inspection: Re-torque plus-nuts and bracket bolts.
-
Wipe Clean: Remove dust and grease with mild detergent.
-
Rust Prevention: Touch up scratched paint with rust-inhibitor spray.
-
Reconfigure as Needs Change: Adjust divider placement without new hardware.
Consequently, your storage solution adapts with your business needs.
Organized, Secure, and Ready
At Upfit Supply, we recognize that Installing a Weather Guard Shelf elevates both safety and efficiency. With vehicle-specific brackets, robust steel, and quick install, you’ll have a professional storage system in under an hour.
Ready to upgrade your van’s cargo area? Shop now:
Watch the full install tutorial: Installing a Weather Guard Shelf in RAM ProMaster City
With Upfit Supply, your van works as hard as you do—no exceptions.
Products Used On This Upfit
-
Rear Installation Kit, RAM ProMaster City
Regular price $249.23Regular priceUnit price percheck_box 37 in stock. Ships in 1-2 business days.
Vendor:

