Installing Vantech H2.1 Cargo Rack on RAM ProMaster
|
Posted in Install Videos
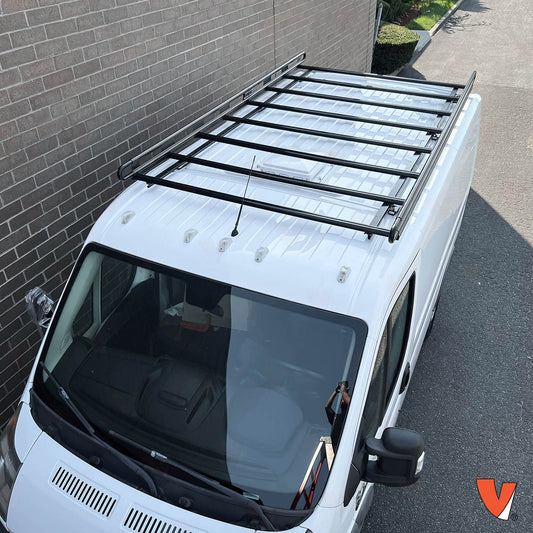
Need more room to haul ladders, pipes, or lumber? A durable roof rack is a game-changer—and installing Vantech H2.1 Cargo Rack for the RAM ProMaster delivers. In this guide, we’ll walk you through the full installation process, highlight its heavy-duty features, and share pro tips to help you get the job done right. With the right setup, expanding your van’s capabilities has never been easier.
Why Installing Vantech H2.1 Cargo Rack on RAM ProMaster Matters
First, interior storage fills fast on the job. Consequently, an external cargo rack frees up workspace inside. Additionally, the H2.1’s heavy-duty steel construction resists daily wear and tear. Finally, its sleek black powder-coat finish complements any ProMaster model. As a result, you secure payload while enhancing your van’s appearance.
Key Features of the Vantech H2.1 Cargo Rack
When you choose this system, you unlock:
-
Modular Crossbar Count: Fits 118", 136", 159", and extended wheelbases
-
Universal Mounting Feet: Slide over factory T-bolts—no drilling needed
-
Dual-Channel Crossbars: Snap-in rubber bar guards protect cargo rails
-
Accessory-Ready Design: Top channels accept J-Series clamps and sliders
-
High Roof Compatibility: Adjustable uprights suit ProMaster high-roof models
Moreover, the rack carries up to 500 lbs safely when installed per instructions.
Preparing Your Van for the Rack Install
First, park on level ground with ample overhead clearance. Next, clear the roof of debris and line a protective tarp on the ground. Meanwhile, unpack all rack components on a bench. Then, review Vantech’s illustrated guide. Finally, group hardware by rack section for streamlined bench work.
Bench Work: Assembling Crossbars and Uprights
Before climbing onto the van, assemble three rack sections: front, center, and rear. Moreover, install rubber bar guards into each crossbar channel. Consequently, your ladders glide smoothly without scratching rails.
-
Snap-In Bar Guards
First, press each guard into the top channel. Alternatively, roll a dowel to speed installation.
-
Attach Crossbars to Uprights
Next, align crossbar holes with uprights’ mounting slots. Then, hand-thread bolts and washers. Finally, snug lightly to maintain some movement.
-
Secure Lower Lip Rails
Afterwards, flip each assembly and slide in slider bolts. Meanwhile, attach inner-channel rails with washers and lock nuts. Keep hardware loose for on-van alignment.
Step-by-Step Guide to Installing Vantech H2.1 Cargo Rack on RAM ProMaster
-
Install Mounting Feet
First, retract factory T-bolts in the roof rail. Then, slide Vantech feet over T-bolts. Meanwhile, orient feet to match rack section locations.
-
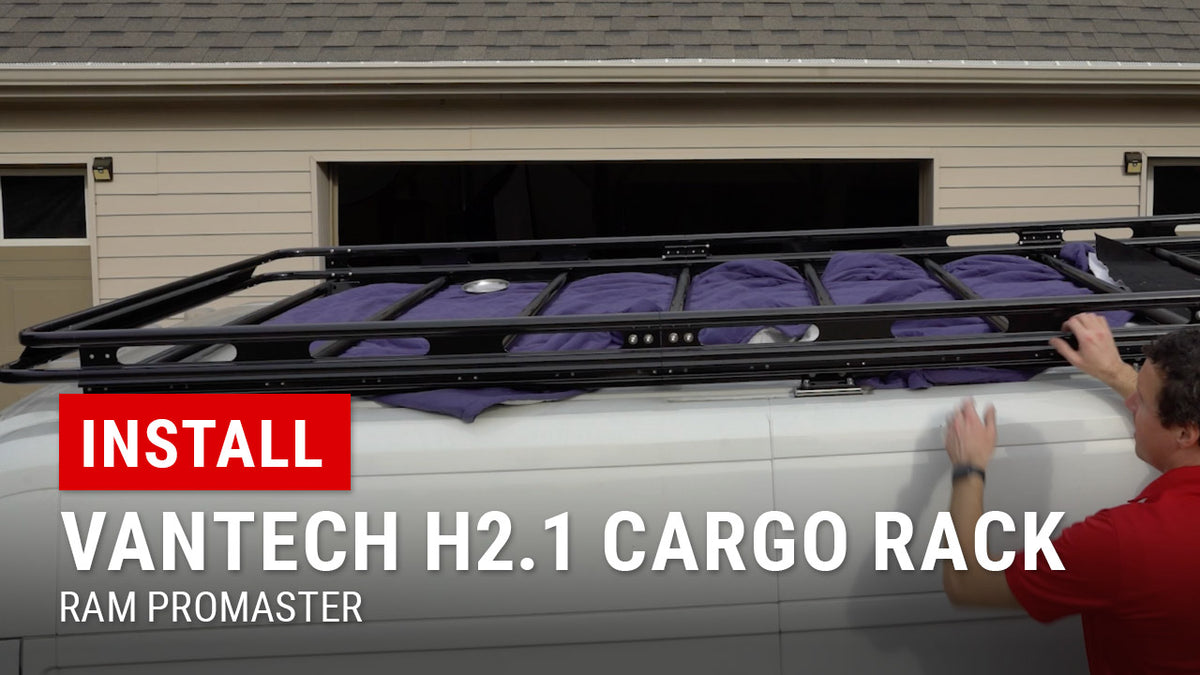
Lift Front Section
Next, hoist the front rack section atop the mounting feet. Afterward, loosely tighten foot hardware, allowing section adjustment.
-
Add Center Section
Then, join the center to the front section using provided hinge clamps. Moreover, insert slider bolts into lower channels near center feet.
-
Set Rear Section
Afterwards, place the rear section onto the back feet. Meanwhile, align mounting feet and slider bolts for all sections.
-
Attach Crossbars
Next, slide crossbars into feet channels. Then, secure with carriage bolts, washers, and lock nuts. Keep bolts snug but adjustable.
-
Install Ladder Roller
Finally, position the optional roller accessory at the rear bar. Consequently, you protect ladders and improve loading ease.
-
Final Alignment and Torque
Meanwhile, center the rack on the roof. Then, torque foot hardware to 20 ft-lbs and crossbar bolts to 15 ft-lbs. As a result, you ensure a rattle-free, secure fit.
Pro Tips for a Flawless Cargo Rack Installation
-
Reference the Vantech Manual: Always follow manufacturer torque specs.
-
Use Blue Loctite: Prevents vibration-induced loosening on critical bolts.
-
Test for Clearance: Open the rear doors and hatch to verify no interference.
-
Inspect & Re-Torque: Check all hardware after 100 miles and annually thereafter.
-
Consider Accessories: Use the built-in channels for solar panel clamps or J-Series hooks.
Furthermore, adding reflective tape to crossbars improves nocturnal visibility.
Maintaining Your Vantech H2.1 Cargo Rack
After Installing Vantech H2.1 Cargo Rack on RAM ProMaster, upkeep is straightforward:
-
Clean Quarterly: Rinse off salt and debris to prevent corrosion.
-
Check Hardware Tightness: Verify torque settings under heavy use.
-
Inspect Bar Guards: Ensure rubber inserts remain seated in the channels.
-
Touch Up Paint: Apply black enamel to any scratched areas.
By following these steps, your rack remains dependable and attractive for years.
Expand Your Van’s Utility
At Upfit Supply, we know that Installing Vantech H2.1 Cargo Rack on RAM ProMaster unlocks new jobsite possibilities. With no-drill mounting, modular crossbars, and accessory-ready design, this rack meets professional demands. Ready to boost your van’s capacity? Explore the product and tutorial below:
- Vantech H2.1 Cargo Rack for RAM ProMaster
-
Watch the Tutorial: Installing Vantech H2.1 Cargo Rack on RAM ProMaster
With Upfit Supply, you get solutions that work as hard as you do—no exceptions.
Products Used On This Upfit
-
Vantech H2.1 Roof Rack for RAM ProMaster
Regular price From: $1,439.20Regular priceUnit price per$1,799.00Sale price From: $1,439.20check_box In stock.
Vendor: Sale
Sale