How To Install a Plus Nut in a Cargo Van

Installing a plus nut in a cargo van can seem challenging at first, but with the right tools and techniques, it’s a straightforward process. Plus nuts, also known as blind fasteners, provide secure mounting points in hard-to-reach areas, like sheet metal in cargo vans or truck beds, where using a traditional nut and bolt might be impossible.
What is a Plus Nut?
A plus nut is similar to a rivet but slightly larger, making it ideal for cargo van equipment installation. Unlike traditional riv nuts, plus nuts have an extended body, providing a strong, reliable anchor for heavier equipment such as shelving, partitions, or bed slides.
Pro Tip: “A plus nut is not just a riv nut—it has a longer body that’s built to handle more weight and force.”
Tools You’ll Need
To set a plus nut, you’ll need:
- A plus nut tool – hand or power tool options are available.
- The correct plus nut size (often 1/4-inch-20 threading for cargo van equipment).
- A wrench or impact driver, depending on your chosen method.
Step-by-Step Installation of a Plus Nut
1. Select the Right Tool
We recommend using the Astro 1450 hand tool. This tool has an extended mandrel, which is essential for installing plus nuts correctly.
Pro Tip: “Make sure you have the longer mandrel for plus nuts. A shorter one won’t work and could damage the plus nut.”
2. Thread the Plus Nut onto the Tool
Attach the plus nut to the mandrel of the tool, ensuring that the threading on the nut matches the tool. This alignment is crucial for a secure fit.
3. Insert the Plus Nut into the Hole
Position the plus nut through the pre-drilled hole in the sheet metal of your van. Ensure it fits snugly to avoid shifting during installation.
4. Expand the Plus Nut
Use the tool to squeeze the plus nut and expand it. For hand tools, you may need to give it a couple of pumps until the nut is fully seated.Pro Tip: “Make sure the threading is nice and centered. This ensures a tight fit and reduces the chance of the plus nut spinning or loosening over time.”
Alternative Methods for Plus Nut Installation
If you don’t have a dedicated plus nut tool, there are other methods you can try.
Using a Disposable Plus Nut Tool
Some plus nuts come with a disposable tool that prevents the nut from spinning. This method involves a bolt and a serrated tool that holds the nut in place.
Manual Installation with a Wrench
For a more delicate installation, use a wrench to thread the bolt manually, which is especially useful when working on exterior doors or thin sheet metal.
Pro Tip: “Doing it by hand can help you feel when the nut is tight enough without over-tightening, which can damage the threads.”
Speeding Up with an Impact Driver
For larger projects, an impact driver can save time, but be cautious not to overtighten, as this may strip the threads.
Pro Tip: “Use a bit of oil on the threads to prevent them from heating up and shearing off.”
Removing a Plus Nut
Removing a plus nut requires a different approach since they’re designed to stay in place. If you need to remove one, drill through the nut using a drill bit that matches the size of the hole pre-drilled in the sheet metal, but keep in mind that your aim is to destroy the nut in the process.
Pro Tip: “Grab the plus nut with a vice to keep it from spinning as you drill. This prevents damage to the surrounding metal.”
Wrapping Up
With a bit of practice and the right tools, installing a plus nut becomes a manageable task. Whether setting up shelving or mounting partitions, Upfit Supply will help you make the most of your cargo van upfit. Check out our products for everything you need to get your vehicle work-ready.
-
Sale!
 Holman Plus Nut Installation ToolOriginal price was: $11.72.$9.47Current price is: $9.47.100+ in stock. Ships in 1-2 business days.
 Add to cart
-
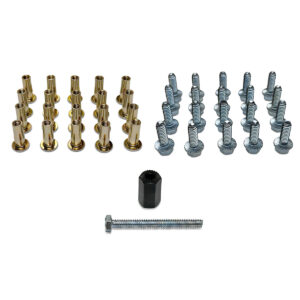
Plus Nut + Bolt Fastener Kit$19.99Out of stockRead more
-
Plus Nut Installation Tool (1/4″-20)$7.994 in stock. Ships in 1-2 business days.Add to cart
-
Plus Nut Installation Tool (M8)$7.9928 in stock. Ships in 1-2 business days.Add to cart
-
Sale!
Plus Nuts – 1/4 x 20 Bolt (Box Of 2000)Original price was: $2,218.93.$2,107.98Current price is: $2,107.98.3 in stock. Ships in 1-2 business days.Add to cart
-
Plus Nuts – 1/4″-20 (20 Pack)$7.9941 in stock. Ships in 1-2 business days.Add to cart
-
Plus Nuts – M8 (20 Pack)$14.9925 in stock. Ships in 1-2 business days.Add to cart
-
Plus Nuts / Blind Fasteners / Riv Nuts$46.3415 in stock. Ships in 1-2 business days.Add to cart