Installing Holman Partition in our Ford Transit

Installing a Holman partition in your Ford Transit cargo van can significantly improve safety, organization, and efficiency. This partition acts as a protective barrier between the driver’s cabin and the cargo area, ensuring that items stay secure during transport. Follow this step-by-step guide to install a partition correctly and learn what makes Holman products a top choice.
Why Choose a Holman Partition?
Holman partitions offer several features that set them apart from competitors:
- Integrated Hinges: For partitions with doors, the hinge comes pre-installed, making the process more convenient.
- Flexible Options for Different Roof Heights: Kits are designed specifically for low-roof, mid-roof, and high-roof configurations.
- Modular Design: Choose between fixed panels or upgrade to a door for added functionality.
- Pre-threaded Mounting Points: Simplifies installation and reduces the need for drilling.
Tools and Materials Needed
- Phillips head screwdriver
- Bolt and lock nut kit (included)
- Plus nuts and clip nuts (included)
- Masking tape (optional for easier washer placement)
Step 1: Gather the Right Kits
Installing a Holman partition requires two key components:
- Center Panel Kit – Matches your van’s roof height.
- Wing Kit – Complements the center panel and also varies by roof height.
Pro Tip: “Always double-check that your kit matches your van’s specifications. A mid-roof partition won’t fit a high-roof van, and vice-versa.” – Ryan, Upfit Supply
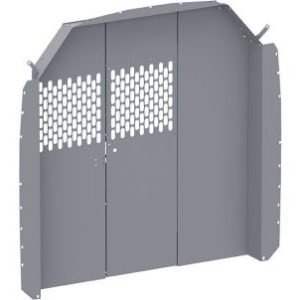
Step 2: Assemble the Center Panels
- Identify the components: The main partition typically comes pre-assembled with a hinge.
- Connect the panels: Use the included bolts and lock nuts to join the panels together.
- If adding a door, insert two washers between the panels to allow movement. Use masking tape to keep washers aligned if needed.
- Tighten all bolts: Leave them snug but not fully tight to allow for adjustments later.
Pro Tip: “The integrated hinge makes adding a center door seamless—you just need to install a latch kit later.”
Step 3: Attach the Wing Panels
- Align the wing panels with the center partition.
- Use bolts and nuts to secure the wings, but leave room for movement to align everything once installed in the van.
Add top wings: Install the top panels using the same method, keeping the bolts loose for alignment.
Step 4: Position and Mount the Partition in the Van
- Remove any D-rings or grab handles from the B-pillar to make room for the partition.
- Fit the partition against the B-pillars and the roof brace.
- Mark mounting points: Identify spots for plus nuts or clip nuts.
- Plus Nuts: Ideal for new mounting points—use a plus nut tool for installation.
- Clip Nuts: Fit into existing unthreaded holes, creating a secure threaded location.
Safety Tip: “Using clip nuts can save time and avoid extra drilling, especially if you’re working with existing holes.”
Step 5: Secure the Partition
- Attach the bottom sill plate: Align it with the pre-threaded holes and secure it with bolts and washers.
- Fasten the partition to the B-pillars:
- Use self-threading screws for top and corner brackets.
- Tighten corner brackets to ensure a snug fit against the B-pillars.
Reinstall D-rings or grab handles if applicable, using factory bolts.
Step 6: Final Adjustments
- Check alignment: Ensure all panels and wings are correctly aligned before fully tightening bolts.
- Tighten all fasteners: Start from the bottom and work your way up to ensure the partition is stable.
- Install the door latch (sold separately): If using a center door partition, follow the instructions to add the handle and latch mechanism.
Benefits of Installing a Holman Partition
- Enhanced Safety: Keeps cargo secure, reducing the risk of items shifting into the driver’s area.
- Easy Installation: Modular kits and pre-threaded holes streamline the installation process.
- Compatibility with Multiple Vans: Works with Ford Transit, Mercedes Sprinter, and Ram ProMaster models.
Tip: “The installation process is similar across van models—just ensure you choose the right partition size for your roof height.”
Holman Partitions Are An Easy Van Upgrade
Installing a Holman partition is a smart investment for any work van, offering both safety and organization. Whether you’re using a fixed panel or upgrading to a door partition, the process is straightforward with the provided instructions and hardware.
Looking for a Holman partition or other van equipment? Explore our products at Upfit Supply for everything you need to customize your vehicle for work.