Installing Holman Shelf in Ford Transit Connect Using Mounting Kit 48301TC
When it comes to van organization, efficiency and safety go hand in hand. That’s why we’re big fans of installing the Holman Adjustable Shelf (4832L) in the Ford Transit Connect using the 48301TC Mounting Kit. This no-drill solution makes installation faster, cleaner, and more secure—perfect for long-term use in work vans built for reliability.
At Upfit Supply, we don’t just sell equipment—we test it, review it, and make sure our customers get the best solutions for their build. In this guide, we’ll walk you through how to install the Holman shelf with the 48301TC bracket kit, highlight why this combo works so well, and share practical tips to help you get the job done right the first time.
Why Use the 48301TC Mounting Kit?
Before we dive into the install, let’s take a closer look at why installing the Holman Shelf in a Ford Transit Connect using Mounting Kit 48301TC is such a great choice.
- No drilling required — utilizes factory mounting locations
- Avoids fuel tank interference underneath the Transit Connect
- Designed for perfect shelf alignment and support
- Compatible with both passenger and driver side installs
- Cuts down installation time significantly
Thanks to this bracket system, you don’t have to risk drilling into sensitive areas or spend hours finding hardware that fits.
What’s in the 48301TC Mounting Kit?
The kit includes:
- Three powder-coated steel brackets: two wall mounts and one floor bracket
- Mounting straps that align with pre-existing holes in the van
- Pre-drilled slots and holes for easier shelf attachment
You’ll still need hardware that comes with the Holman shelf itself to complete the full install, but the kit covers everything needed to connect the brackets to the Transit Connect.
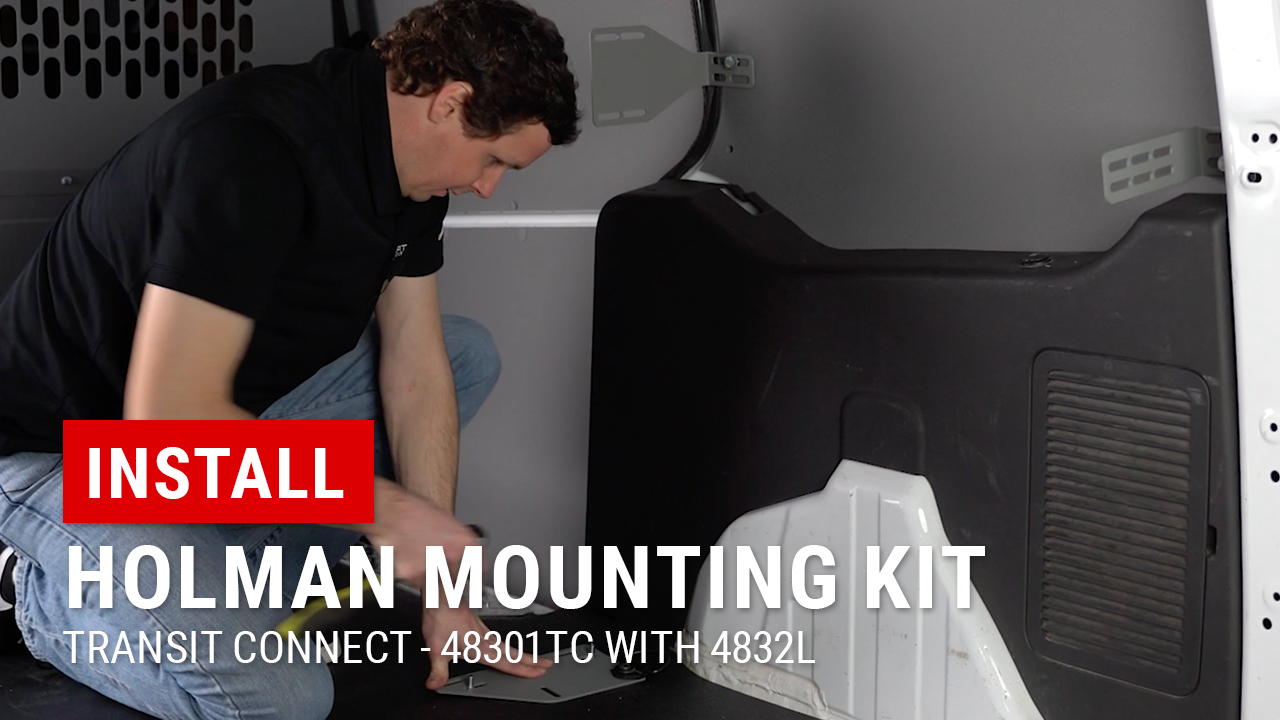
Step 1: Prep the Mounting Points in the Van
To start installing the Holman Shelf in the Ford Transit Connect using Mounting Kit 48301TC, we prep the mounting points.
- If your van has interior wall liners, remove them temporarily or pre-drill access holes for bracket bolts
- Identify the rear and forward wall mounting points—these are already built into the Transit Connect’s structure
- Locate the floor D-ring bracket you’ll remove and reuse for the floor bracket
Using factory points ensures secure shelf support without altering the van’s frame.
Step 2: Install the Rear Wall Bracket
Let’s mount the rear wall bracket first.
- Use the bottom hole in the bracket for attachment
- Insert a bolt with washer and lock washer into the wall’s factory thread
- Leave the bracket loosely tightened so you can adjust it once the shelf is positioned
Step 3: Install the Forward Wall Bracket
Next, attach the forward wall bracket.
- This bracket mounts via the top elongated hole
- Use the same bolt, washer, and lock washer combo as before
- Again, only hand-tighten at this stage so you can fine-tune alignment later
These two wall brackets create a strong anchor for the vertical shelf supports.
Step 4: Attach the Floor Bracket Using the D-Ring Bolt
Now we move to the floor bracket, which attaches using the existing D-ring bolt.
- Remove the D-ring with a T50 Torx bit
- Slide the bracket into place and reinsert the bolt through the bracket and back into the floor
- For vans without elevated flooring, add a plastic washer (from the shelf kit) underneath to level the bracket
- Slide the included carriage bolts through the bracket slots—these will attach to the shelf legs later
As with the wall brackets, leave everything slightly loose so you can adjust during the final fit.
Step 5: Place the Holman Shelf into the Van
Now it’s time to install the shelf.
- Lift the shelf into position—do not drag it across the floor to avoid damage
- Align the shelf feet with the carriage bolts from the floor bracket
- Line up the side panels with the holes on the wall brackets
Because the brackets are designed specifically for the Transit Connect, the shelf fits snugly without hassle.
Step 6: Attach the Shelf to All Three Brackets
To secure the shelf:
- Use the included shelf hardware (bolts, washers, nylon lock nuts) to connect the shelf to each bracket
- The floor carriage bolts require the washer and nut set from the mounting kit
- Insert all bolts loosely at first, ensuring everything lines up correctly
- Once positioned, begin tightening from top to bottom, finishing with the floor mount
This ensures even pressure and alignment across the frame.
Step 7: Final Adjustments and Tightening
After securing all bolts:
- Double-check that the shelf is level and aligned
- Confirm that the brackets sit flush to the van’s walls and floor
- Finish by fully tightening each fastener
Now your Holman shelf is locked in and ready for work.
Benefits of This Install Method
Installing the Holman Shelf in the Ford Transit Connect using Mounting Kit 48301TC offers several advantages over traditional methods:
- No drilling means no risk of hitting wiring or the fuel tank
- Speeds up installation significantly
- Allows for reversible or mirrored shelf placement on either side of the van
- Leaves room to expand your upfit with drawers, bins, or additional shelves later
We’ve found this kit especially helpful for fleet setups where repeatable installs are key.
Ready to Get Started?
At Upfit Supply, we aim to simplify your van build with products that work—and work well. The 48301TC mount kit and Holman adjustable shelf are a perfect match for Transit Connect owners looking to upfit their cargo space with minimal hassle.
Shop the Mounting Kit 48301TC
Watch the Installation Video on YouTubeNeed the matching shelf? Grab the Adjustable 3 Shelf Unit – 32″ W x 43″ H x 14″ D here:
Shop the Holman Shelf (4832L)