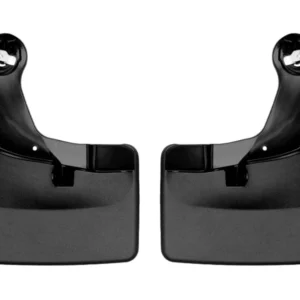
Installing WeatherTech Front Mud Flaps on Our Ford F-150

Every mile adds up—so protecting your truck from road debris is a smart move. WeatherTech’s Front Mud Flaps for the Ford F-150 offer a clean, no-drill solution that installs fast and holds strong. In this guide, we’ll take you through the entire process—from prep to final fit—in under 30 minutes. You’ll also get a closer look at standout features like durable Thermoplastic Polyurethane (TPU) construction, quick-turn fasteners, and a precision-molded fit designed specifically for your truck.
Why Installing WeatherTech Front Mud Flaps on Our Ford F-150 Matters
First, road debris chips paint and accelerates rust. Moreover, water spray reduces visibility for following drivers. Therefore, adding WeatherTech front mud guards provides:
- Precision Fit: Tailored for 2015–2023 Ford F-150 front fenders.
- Tough TPU Material: Resist cracking, fading, and solvents.
- No-Drill Installation: Clamps securely without harming body panels.
- Quick-Release Mechanism: Swap or remove flaps in seconds.
Consequently, you protect your truck and other vehicles on the highway. Plus, you maintain a professional look.
Tools for Installing WeatherTech Front Mud Flaps on Our Ford F-150
Before you begin Installing WeatherTech Front Mud Flaps on Our Ford F-150, gather:
- 7 mm socket and ratchet for factory hex screws
- 10 mm wrench for lower pinch-weld bolt
- Trim tool to remove plastic clips
- Clean cloth to wipe mounting areas
Meanwhile, park on level ground and engage the parking brake. This small step ensures a safe, smooth install.
Prep and Removal: Clearing the Way
First, prep the passenger side:
- Remove Hex Bolts: Use a 7 mm socket to extract two factory bolts from the inner fender.
- Pop Plastic Clip: Pry out the clip at the lower pinch weld with a trim tool.
- Remove Pinch-Weld Bolt: Unbolt the 10 mm fastener near the wheel well.
- Clean Mounting Area: Wipe away dirt to ensure a snug clamp.
Next, repeat on the driver side. Meanwhile, keep all factory hardware—you’ll reuse it.
Step-by-Step: Installing WeatherTech Front Mud Flaps on Our Ford F-150
Now follow these steps to complete Installing WeatherTech Front Mud Flaps:
- Select Correct Flap: Choose the right-hand flap marked “RH” for passenger side.
- Unlock Quick-Turn: Rotate the clamp lever to “unlock” on the back of the flap.
- Position Flap: Align upper flange with factory bolt holes and lower clamp on pinch weld.
- Lock in Place: Rotate the lever to “lock” the flap against the fender.
- Reinstall Hardware: Use the original hex bolts and pinch-weld bolt to secure the flap.
Furthermore, the no-drill design preserves your F-150’s factory finish.
Final Inspection After Installing WeatherTech Front Mud Flaps on Our Ford F-150
Once both flaps are in place:
- Check Clamp Engagement: Ensure quick-turn levers click into the locked position.
- Tighten Fasteners: Snug all bolts and clips—no need to over-torque.
- Verify Flap Alignment: Confirm even spacing from tire to mud flap.
- Test Clearance: Turn wheels full lock both directions to avoid rubbing.
Finally, give the flaps a tug. They should hold firm without wobble.
Maintenance Tips for Your New Mud Guards
To extend flap life:
- Wash Regularly: Spray off road salt and grime with a garden hose.
- Inspect Clips: Check quick-turn clamps for wear or debris buildup.
- Avoid Harsh Chemicals: Use mild soap; strong solvents can degrade TPU.
- Seasonal Removal: Lock to “unlock” for easy removal before auto washes.
Consequently, your WeatherTech front splash guards remain effective mile after mile.
Professional Protection in Minutes
At Upfit Supply, we know that Installing WeatherTech Front Mud Flaps upgrades both protection and style. With resilient material, factory-fit accuracy, and hassle-free install, these flaps are a top choice for trades and enthusiasts alike.
Ready to guard your fenders? Shop now:
WeatherTech Front Mud Flaps for Ford F-150
Watch the full tutorial: Installing WeatherTech Front Mud Flaps
With Upfit Supply, your truck works as hard as you do—no compromises.