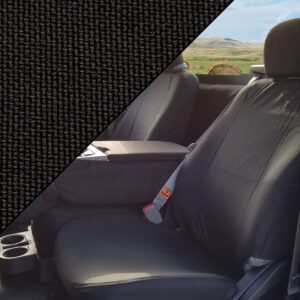
Installing TigerTough Seat Covers for Ford F-150 (Front Row)

Protecting your truck’s interior doesn’t just keep things looking sharp—it helps extend its lifespan and resale value. That’s why TigerTough Seat Covers for the Ford F-150 (Front Row) are a favorite among owners who put their trucks to work. In this guide, we’ll walk you through the full installation—from prep to final fit—so you can get durable, rip-resistant protection in under an hour. Key features include marine-grade neoprene, airbag-safe paneling, and universal-fit straps that keep everything secure, even on tough jobs.
Why Installing TigerTough Seat Covers for Ford F-150 (Front Row) Matters
Firstly, bucket seats see daily wear from work boots and tools. Moreover, spills and UV rays degrade OEM upholstery. Therefore, Installing TigerTough Seat Covers for Ford F-150 (Front Row) delivers:
- Precision Fit: Laser-measured for 2015–2023 F-150 bucket seats.
- Marine-Grade Neoprene: Stands up to water, oil, and chemicals.
- Airbag-Ready Design: Side panels tear away cleanly on deployment.
- Easy Cleaning: Rinse with water or wipe with a damp cloth.
Consequently, your seats stay pristine. Plus, you maintain a professional appearance.
Tools for Installing TigerTough Seat Covers for Ford F-150 (Front Row)
Before you begin Installing TigerTough Seat Covers, gather:
- Trim removal tool for pop-out plugs
- Flathead screwdriver to release headrest buttons
- Shop vacuum to clear debris under seats
- Protective gloves to handle neoprene edges
Meanwhile, park on level ground and slide each seat fully back. This small prep step saves time.
Removing Factory Trim and Headrests
Next, clear OEM materials:
- Slide headrests up fully.
- Press release buttons on both sides.
- Pull headrests out and set aside with care.
- Prise out pop plugs on seat backs using the trim tool.
Then vacuum around seat tracks. Consequently, you’ll have room to fit your new covers smoothly.
Step-by-Step: Installing TigerTough Seat Covers for Ford F-150 (Front Row)
Now let’s install:
- Identify covers: Confirm “Driver” and “Passenger” labels.
- Inspect foam side: The cushion-lined panel goes against the seat.
- Slide on seat back: Turn cover inside-out three-quarters, then pull down.
- Tuck flaps under: Guide fabric between seat back and base.
- Secure Velcro straps: Feed front-to-back straps through seat crevices.
- Fish out side straps: Use the provided tool to loop under frames.
- Tighten string locks: Pull side strings firmly, then lock in place.
- Attach headrest covers: Slide over posts and reinsert headrests.
Moreover, repeat these steps on the opposite seat. Each cover installs in under 30 minutes.
Final Checks After Installing TigerTough Seat Covers for Ford F-150 (Front Row)
After installation, verify:
- Airbag access: Ensure side panels tear-away cleanly.
- Strap tension: Confirm no slack under seats or around frames.
- Smooth Fit: Check fabric lays flat without bunching.
Finally, test seat adjustment. Then wipe down covers to remove any fingerprints.
Maintenance Tips for TigerTough Seat Covers
To prolong service life:
- Weekly wipe-down: Remove dust and spills promptly.
- Rinse stains: Use mild soap and water on neoprene.
- Inspect straps: Tighten or reposition if loose.
- Avoid harsh solvents: They degrade neoprene and stitching.
Consequently, your seat protectors stay functional and fresh.
Professional Protection in Minutes
At Upfit Supply, we understand that Installing TigerTough Seat Covers transforms your interior instantly. With marine-grade materials, airbag compatibility, and precision fit, this upgrade pays dividends in durability and style.
Ready to shield your seats? Shop now:
TigerTough Seat Covers for Ford F-150 Front Bucket Seats
Watch the full install tutorial: Installing TigerTough Seat Covers
With Upfit Supply, your truck works as hard as you do—no exceptions.