
Installing WeatherTech Rear Mud Flaps on Our Ford F-150
|
Posted in Installation Videos
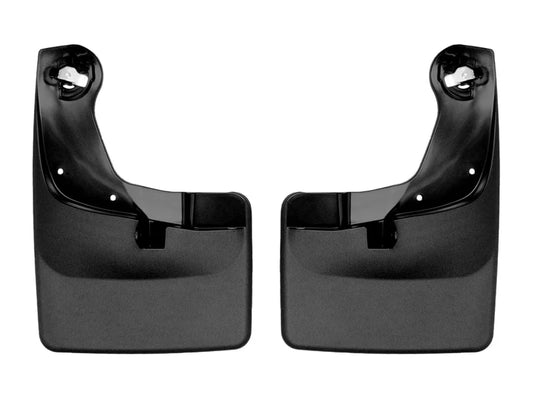
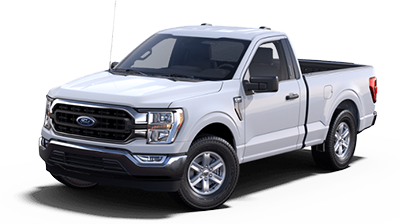
Road debris, mud, and grime can do a number on your truck over time—which is why a solid set of rear mud flaps is a smart investment. The WeatherTech Rear Mud Flaps for the Ford F-150 offer reliable protection with a fast, no-drill install. In this guide, we’ll walk you through each step—from prep to final fit—in under 30 minutes. Along the way, we’ll highlight features like durable TPU construction, quick-turn fasteners, and a custom-fit design that blends seamlessly with your truck’s factory look.
Why Installing WeatherTech Rear Mud Flaps on Our Ford F-150 Matters
First, rear wheels kick up gravel and water. Moreover, road salt accelerates corrosion. Therefore, adding WeatherTech rear mud guards delivers:
-
Exact Fit: Engineered for 2015–2023 Ford F-150 rear fenders.
-
Heavy-Duty TPU: Resists cracking, fading, and harsh chemicals.
-
No-Drill Design: Clamps on without drilling or permanent modifications.
-
Quick-Release System: Removes easily for snow chains or cleaning.
Consequently, you shield both your truck and following vehicles. Plus, you maintain that showroom appeal.
Tools Needed for Installing WeatherTech Rear Mud Flaps on Our Ford F-150
Before you start Installing WeatherTech Rear Mud Flaps on Our Ford F-150, gather:
-
Trim tool to pry plastic clips
-
Ratchet & 7 mm socket for factory fasteners
-
10 mm wrench for lower pinch-weld bolt
-
Clean rag to wipe mounting areas
Meanwhile, park on level ground and apply the parking brake. This preparation streamlines the process.
Prep and Removal: Clearing the Mounting Area
First, prep the passenger side:
-
Pop Plastic Clips: Remove two behind wheel well and one under fender lip with trim tool.
-
Clean Surface: Wipe dirt and grime to ensure snug clamp contact.
-
Identify Correct Flap: Use the “RH”-stamped flap on the passenger side.
Next, repeat on the driver side. Meanwhile, keep all original clips and bolts for reuse.
Step-by-Step: Installing WeatherTech Rear Mud Flaps on Our Ford F-150
Now follow these steps to complete Installing WeatherTech Rear Mud Flaps:
-
Unlock Quick-Turn Lever: Rotate to “unlock” on back of each flap.
-
Position Upper Flange: Slide over factory hex bolt holes under fender.
-
Engage Lower Clamp: Hook the mud guard clip onto the pinch weld.
-
Lock Lever: Rotate to “lock” and clamp firmly against the fender.
-
Secure Fasteners: Reinstall original hex bolts and pinch-weld bolt.
Additionally, the no-drill installation preserves your F-150’s warranty and finish.
Final Checks After Installing WeatherTech Rear Mud Flaps on Our Ford F-150
Once both flaps are mounted:
-
Verify Clamp Engagement: Ensure each quick-turn lever clicks firmly.
-
Tighten Fasteners: Snug all bolts—no need for high torque.
-
Confirm Alignment: Check even spacing between flap edge and tire.
-
Test Clearance: Turn wheels full lock to avoid rubbing.
Finally, give each mud flap a gentle pull. They should hold without movement.
Maintenance Tips for Your Rear Mud Guards
To keep your mud guards working like new:
-
Rinse Frequently: Spray off salt and road grime after each trip.
-
Inspect Clamps: Check quick-turn levers and clips for wear.
-
Use Mild Soap: Avoid solvents that degrade TPU material.
-
Seasonal Storage: Unlock fasteners and remove flaps for winter service.
Consequently, your WeatherTech rear fender flaps stand up to daily abuse.
Quick Protection, Lasting Durability
At Upfit Supply, we understand that Installing WeatherTech Rear Mud Flaps is more than an add-on. It’s a smart investment in protection and style. With rugged TPU, tailored fit, and no-drill convenience, these flaps deliver professional results in minutes.
Ready to guard your F-150? Shop now:
Watch the full install tutorial: Installing WeatherTech Rear Mud Flaps
With Upfit Supply, your truck works as hard as you do—no compromises.
Products Used On This Upfit
-
WeatherTech No-Drill DigitalFit MudFlap for Ford F-150 (2021-2025)
Regular price $93.95Regular priceUnit price percheck_box 100+ in stock. Ships in 1-2 business days.
Vendor:

Ford F-150 Accessories
Show Now
Find the work truck equipment and accessories you need for your Ford F-150 from Upfit Supply.
View Products