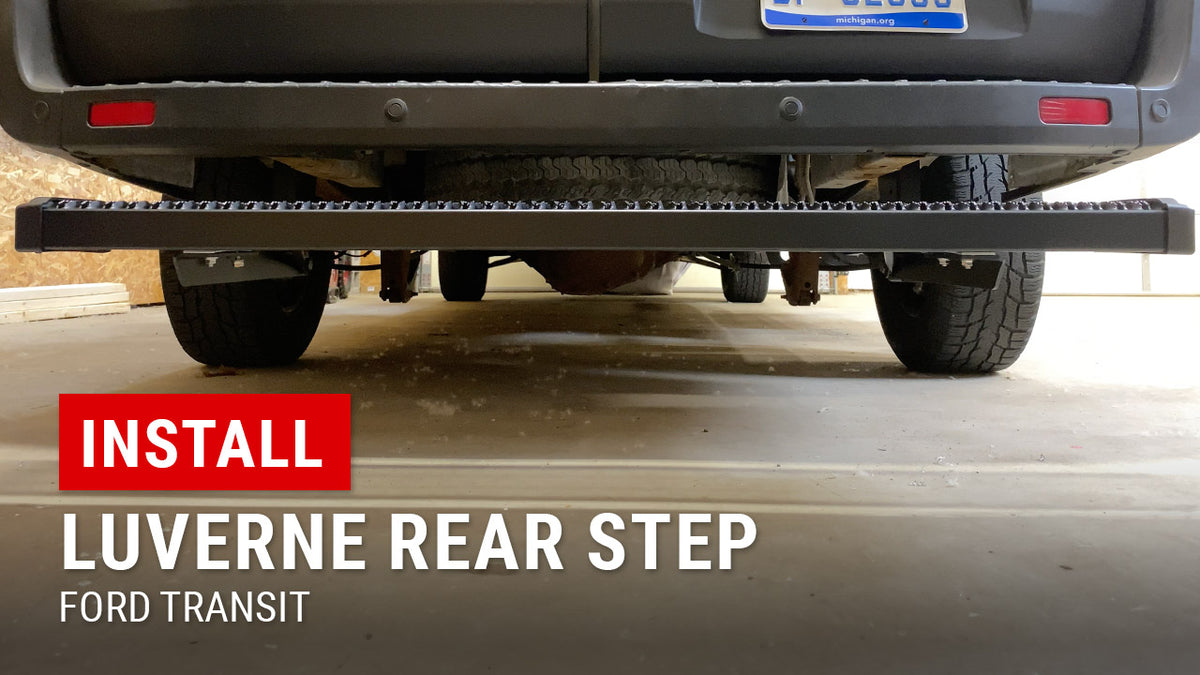
Installing Luverne Rear Step on our Ford Transit
|
Posted in Install Videos
A rear step for your Ford Transit is a practical upgrade that improves safety, accessibility, and convenience. The Luverne Rear Grip Step is designed to provide secure footing when entering and exiting your cargo area, making it ideal for delivery drivers, tradespeople, and anyone who frequently loads and unloads cargo.
This step-by-step guide will walk you through installing the Luverne Rear Step on your Ford Transit, ensuring a secure and proper fit.
Watch the full install video "here.
Why Install a Luverne Rear Step on Your Ford Transit?
The Luverne Rear Grip Step offers several key benefits that make it an essential addition to your Ford Transit:
- Enhanced Safety – Provides a non-slip surface for secure footing, even in wet or icy conditions.
- Heavy-Duty Durability – Made from powder-coated aluminum to resist corrosion and withstand daily wear.
- Simple No-Drill Installation – Utilizes existing mounting points on your Ford Transit’s frame.
- Wide Stepping Surface – Offers 54 inches of stepping area, making it easier to access the cargo area.
- Compatible with Rear Parking Sensors – Designed to work with factory-installed safety features.
Tools & Materials Needed
Before starting, gather the following:
- Metric socket set
- Torque wrench
- Drill with 3/8-inch bit
- Measuring tape
- Marking tool (grease pen or painter’s tape)
- Luverne Rear Grip Step installation kit (included hardware and brackets)
Step-by-Step Installation Guide
1. Install the Vehicle Brackets
- On the passenger side rear frame rail, locate and remove the two factory bolts.
- Align the upper mounting bracket and secure it using the same factory bolts.
- Attach the lower mounting bracket to the upper bracket at mounting locations #2 and #4.
- At location #4, install a brace support for added stability.
- Repeat these steps for the driver-side brackets.
2. Mount the Luverne Rear Step to the Brackets
- Position the step board onto the mounting brackets.
- At each bracket location:
- Slide a galvanized support brace inside the channel of the step.
- Place a flat spacer between the step and the bracket.
- Loosely attach using the included carriage bolts, washers, and nuts.
3. Align and Secure the Step Board
- Measure and adjust the step to ensure it is:
- Centered evenly between both sides of the van.
- Consistently spaced from the rear bumper.
- Once properly positioned, tighten all fasteners securely.
4. Secure the Support Braces
- Hold each support brace firmly against the step board.
- Mark the drill locations on the step for added reinforcement.
- Drill a 3/8-inch hole through the step board at the marked locations.
- Secure the support braces using the supplied hardware and tighten all fasteners.
5. Attach the End Caps
- Slide the end caps onto both sides of the step board.
- Secure them using the self-drilling screws included in the kit.
6. Final Inspection & Testing
- Double-check that all bolts and fasteners are tightened properly.
- Step onto the Luverne Rear Grip Step to ensure stability.
- Confirm that the step does not interfere with rear parking sensors or cargo door operation.
Why Choose the Luverne Rear Step for Your Ford Transit?
1. Superior Traction & Slip Resistance
The expanded tread surface prevents slipping, even in wet or snowy conditions.
2. Built to Last
Made from rust-resistant aluminum with a black powder-coated finish for durability.
3. Easy, No-Drill Installation
Uses existing frame mounting points—no need for modifications.
Final Thoughts: Is the Luverne Rear Step Worth It?
If you need a rugged, non-slip rear step for your Ford Transit, the Luverne Rear Grip Step is a top choice. Its easy installation, durable design, and enhanced safety features make it a must-have for anyone who regularly accesses the cargo area of their van.
Looking for the Luverne Rear Step or other Ford Transit accessories? Check out Upfit Supply today!
Products Used On This Upfit
-
Grip Step 7" X 54" Rear Step for Ford Transit
Regular price $316.95Regular priceUnit price per$360.90Sale price $316.95check_box 100+ in stock. Ships in 1-2 business days.
Vendor: Sale
Sale
Ford Transit Accessories
Discover professional upfit solutions and accessories for your Ford Transit van.
View Products

