Installing Slick Locks on our Ford Transit Connect
When it comes to protecting your tools and equipment, security is non-negotiable. That’s why Slick Locks for the Ford Transit Connect are a go-to upgrade for both fleet managers and independent contractors. In this guide, we’ll walk you through the full installation—from prep to final check—so you can reinforce your van’s sliding doors in under 30 minutes. Along the way, we’ll highlight standout features like the puck-style hidden shackle and no-drill mounting brackets that make this system both tough and easy to install.
Why Installing Slick Locks on our Ford Transit Connect Matters
First, factory side-door locks leave your cargo vulnerable. Moreover, exposed padlocks get cut easily. Therefore, Slick Locks deliver:
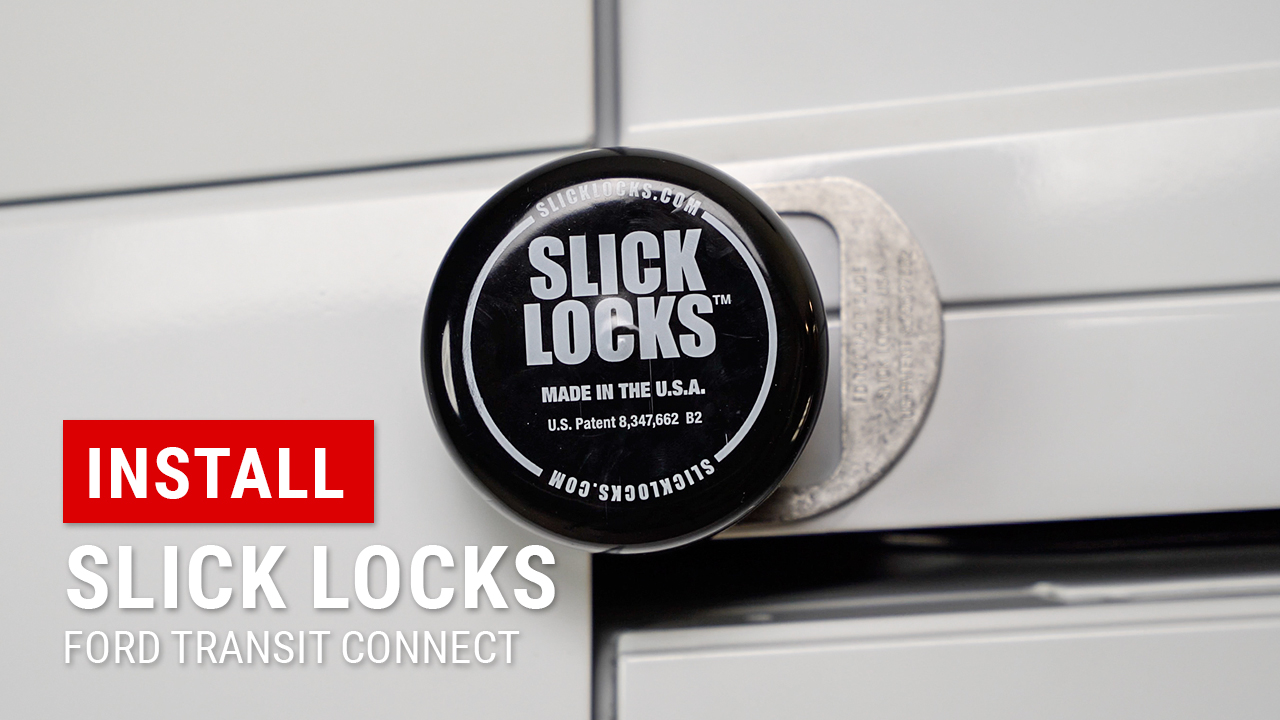
- Puck-Style Design: Concealed shackle resists bolt cutters.
- No-Drill Bracket: Uses existing trim bolt hole—no body damage.
- Hardened Steel Construction: Stands up to pry bars and impact.
- Weatherproof Seal: Keeps out dirt and moisture.
Consequently, your van stays locked down and work-ready.
Tools Needed for Installing Slick Locks on our Ford Transit Connect
Before you begin Installing Slick Locks on our Ford Transit Connect, gather:
- Torx T30 bit (impact or wrench)
- Masking tape or grease pencil for alignment marks
- Ratchet with 10 mm socket for tightening bracket bolt
- Trim tool to remove factory plug
Meanwhile, park on level ground and clear around the sliding door.
Removing Factory Hardware
Next, prep the door for Installing Slick Locks on our Ford Transit Connect:
- Open sliding door: Expose the trim bolt.
- Remove trim plug: Use Torx T30 to extract the factory bolt and cover.
- Protect paint: Apply masking tape where the bracket will clamp.
Afterwards, dry-fit the driver-side bracket by hand. This test-fit confirms correct orientation before final install.
Step-by-Step: Installing Slick Locks on our Ford Transit Connect (Driver Side)
Now we secure the lock bracket:
- Align bracket: Notch faces rearward and bracket sits over the plug hole.
- Hand-tighten bolt: Engage threads carefully—avoid cross-threading.
- Close door slowly: Verify bracket clears the track without binding.
- Mark bracket edge: Note exact bracket perimeter on masking tape.
- Protect paint: Remove bracket and stick the supplied adhesive pad over the marking.
- Final mount: Reinstall bracket, tighten bolt to 60 in-lb torque.
- Attach puck lock: Slide the Slick Lock puck onto bracket until it clicks, keyway outward.
Meanwhile, confirm smooth operation—shackle should retract and lock without snagging.
Step-by-Step: Installing Slick Locks on our Ford Transit Connect (Passenger Side)
Mirroring the driver side, install on the passenger sliding door:
- Remove plug and prep the hole.
- Test-fit bracket, mark, then protect paint with pad.
- Bolt bracket firmly into place.
- Slide on puck lock, aligning the keyway toward the door edge.
Consequently, both sides gain uniform security with minimal effort.
Final Inspection and Maintenance
After Installing Slick Locks on our Ford Transit Connect, perform these checks:
- Lock Function: Turn key—shackle deploys and retracts smoothly.
- Bracket Stability: Attempt to wiggle bracket; it should not move.
- Door Clearance: Open/close sliding door to confirm no interference.
- Seal Integrity: Inspect rubber gasket for full contact.
For lasting performance:
- Lubricate keyway and shackle quarterly with light oil.
- Re-check bolt torque bi-annually.
- Clear debris from shackle area after off-road or dusty use.
Fast, Effective Security Upgrade
At Upfit Supply, we deliver solutions that work. Installing Slick Locks on our Ford Transit Connect adds a puck-style, hidden-shackle lock in minutes—no drilling required. With this upgrade, your tools and gear stay protected.
Ready to secure your Transit Connect?
Product link: Kargo Master Slick Locks Van Door Lock Kit
Watch the full install tutorial: YouTube Video
With Upfit Supply, your van’s security works as hard as you do.