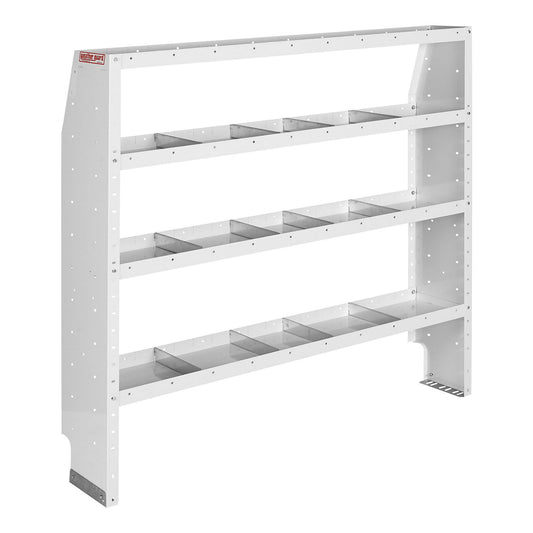
Assembling the Weather Guard 60" x 60" x 13.5" Adjustable Van Shelf
|
Posted in Installation Videos
A Weather Guard shelf goes together quickly, but where you put the shelves matters more than how fast you bolt them on. Get the bottom shelf in the wrong hole and it won't clear the wheel well. Space the others wrong and a door or drawer unit won't fit later. This Weather Guard van shelf assembly guide covers both decisions first, then walks through the build step by step.
Weather Guard Van Shelf Assembly: What We're Building
We're assembling the Weather Guard Adjustable 4 Shelf Unit – 60" W x 60" H x 13.5" D (Model 9376-3-03). It has four shelves, including a tapered 10.5" deep top shelf. This video covers assembly only; installing the unit in the van is coming in a separate video.
Before you start, scan the QR code on the one-page sheet in the box for the latest installation instructions. That's the ultimate source of information, and we follow it here too.
Plan your shelf positions first
Clear the wheel well
If the shelf will sit over a wheel well, the bottom shelf has to be high enough to clear it. Count holes from the bottom of the end panel:
- Ford Transit and Mercedes-Benz Sprinter: hole location 4
- Chevy Express, GMC Savana, and Nissan NV: hole location 5
- RAM ProMaster: hole location 6
Compact vans like the Ford Transit Connect don't need this adjustment. Their wheel wells sit mostly behind the wall.
Space shelves for accessories
If you plan to add accessories, space the shelves to fit them:
- Shelf doors, lockable shelf doors, or back panels: 7 hole increments between shelves
- Drawer units: 8 hole increments
If you aren't adding accessories, space the shelves however you like.
What you'll need
- The small hardware bag with the assembly bolts. The larger bag of brackets and hardware is for installing in the van, so set it aside
- A power drill or driver for final tightening
- A square to keep the unit true before tightening
- A piece of cardboard to protect the end panel and your work surface. The top of the shipping box works well
Step-by-step assembly
Step 1: Lay one end panel flat
Set one end panel down on the cardboard. You'll build the shelves onto it while it lies flat, then add the second panel on top.
Step 2: Install the tapered top shelf
The top shelf is the narrower, tapered one. Small lances at the top of the end panel line up with slits in the sides of the top shelf. Seat the shelf onto the lances; it may need a little encouragement to drop into place.
Step 3: Hand-thread the bolts
Thread each bolt into the shelf's captive nuts by hand first to avoid cross-threading. Snug them down, but don't fully tighten yet.
Step 4: Set the bottom shelf for wheel well clearance
Count up to the hole location for your van (location 4 on our Transit) and use the matching front and back holes. Decide which way the shelf faces:
- Flanges up is the standard mount. The lip cradles your gear, and built-in slits accept the included dividers.
- Flanges down gives you a flat, flush surface, useful for mounting Packout cleats or similar.
Step 5: Add the remaining shelves
Bolt in the middle shelves at your planned spacing. We set ours 7 holes above the bottom shelf so we can add a back panel or door later.
Step 6: Add the second end panel
Lay the second end panel on top. Use the same hole locations as the first panel so no shelf ends up crooked, and make sure the top shelf seats in this panel's lances too.
Step 7: Square it up and tighten
On a 60" wide unit, the shelves can flex side to side a bit. Check the unit with a square, then go back through every bolt with the power tool and tighten everything down.
Tips before it goes in the van
Lift it, don't drag it. The assembled unit weighs about 100 pounds. If it tips onto one leg or gets dragged across the floor, the legs can bend. Lift it straight up and set it in place.
Choose your mounting method. You can install the shelf with the included brackets and hardware, attaching it to the van's wall structure and floor. Or you can use a Weather Guard vehicle-specific mounting kit, like the Ford Transit 148" WB mounting kit. Its aluminum channels mount into existing holes in the van wall, and the shelf attaches to the channels.
Shop the Weather Guard Adjustable 4 Shelf Unit – 60" W x 60" H x 13.5" D
Want to see what's in the box first? Check out our unboxing of this shelf. Browse all van shelving for other sizes.
FAQ
Which hole should my bottom shelf go in?
It depends on your van. Use location 4 for the Ford Transit and Mercedes-Benz Sprinter, location 5 for the Chevy Express, GMC Savana, and Nissan NV, and location 6 for the RAM ProMaster.
How far apart should shelves be for doors or drawers?
Leave 7 hole increments for shelf doors, lockable doors, or back panels, and 8 for drawer units.
Which hardware bag do I need for assembly?
Only the small bag with bolts. The larger bag with brackets is for installing the shelf in the van.
Can I mount the shelves upside down?
Yes. Flanges up is standard and works with the dividers, while flanges down gives you a flush top surface for cleats.
How heavy is the assembled shelf?
About 100 pounds. Lift it into place rather than dragging it, so you don't bend the legs.
We want you empowered to make your own upfitting decision. If you'd rather talk it through, our US-based upfit pros are ready to help.
Products Used On This Upfit
-
Weather Guard Adjustable 4-Shelf Unit (Van Shelving) - 60-in W x 60-in H x 13.5-in D | 9376-3-03
Regular price $721.00Regular priceUnit price per$721.00Sale price $721.00check_box 500+ in stock. Ships in 1 business day.