Installing the Weather Guard 3-Drawer Cabinet on Van Shelving
|
Posted in Installation Videos
Adding drawers to your van shelving is one of the best ways to keep small parts and expensive tools locked up and organized. The Weather Guard 3-drawer cabinet bolts right onto your shelving unit, but a couple of details in the printed manual will cost you time if you follow them as written. This guide walks through the install the right way, including the fixes we found along the way.
Installing the Weather Guard 3-Drawer Cabinet
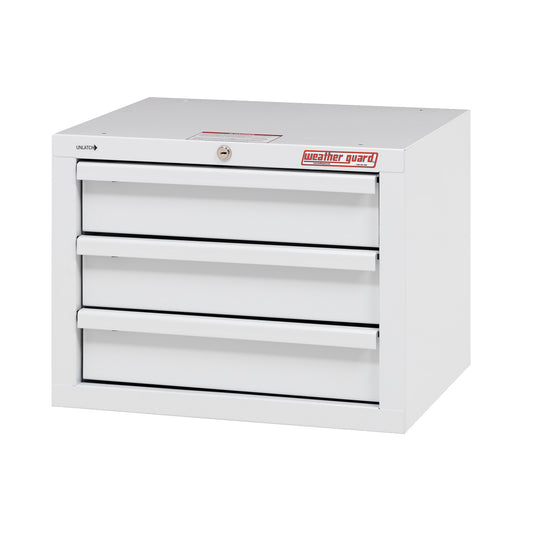
We're installing the Weather Guard Secure Storage Module, 3-Drawer (Model 903-3-01) on the bottom shelf of a 16" deep Weather Guard shelving unit, with two cabinets side by side. The cabinet measures 21" wide, 17" high, and 16" deep, with a welded steel box and drawers, a heavy-duty locking mechanism, and drawers that latch closed even when the cabinet is unlocked.
Two things the manual gets wrong
The printed installation guide has good warning and warranty information, so keep it handy. But two instructions didn't hold up when we did the install.
Shelf spacing is 9 holes, not 8. The shelf assembly guide tells you to space shelves 8 hole locations apart for drawer units. We measured, and it takes 9. Count starting with the hole that holds the lower shelf's bolt head: 1 through 9, and the next shelf goes at 9.
Don't flip the bottom shelf. The instructions say you can mount the shelf upside down and attach the cabinet directly without spacers. The dimensions don't work, and the cabinet won't fit in that space. Mount the bottom shelf flanges up, in the standard orientation.
What you'll need
From the cabinet kit:
- Rubber pads for the tops of the shelf dividers
- Long bolts, spacers, and plastic retaining washers for the bottom mounting points
- Two short bolts and two serrated lock nuts for the top
From your shelving unit:
- Two shelf dividers, which come with the shelf
Step-by-step installation
Step 1: Set your shelf spacing and orientation
Mount the bottom shelf flanges up, with the next shelf 9 holes above it. Make sure the square hole in the bottom of each shelf points toward the front, or inboard, side of the shelving unit. That keeps every hole lined up for the cabinet.
Step 2: Place the dividers and rubber pads
Slide one rubber pad onto the top of each shelf divider. Set the two dividers into the slots on the shelf, spread out slightly. The cabinet sits on top of them.
Step 3: Stage the bottom bolts
At the forward hole closest to the shelf edge, push a long bolt up through the shelf, then add a plastic retaining washer and a spacer. The washer holds the bolt in place while you slide the cabinet in. Repeat at the forward hole just to the right of the square hole, then at the two rear mounting locations.
Step 4: Remove the top drawer
You'll need access to the inside of the cabinet later. Like most cabinet drawers, there are small pins on the sides of the slides. Bend them in opposite directions and pull the drawer out.
Step 5: Slide the cabinet into place
The bottom of the cabinet has six pre-threaded holes, so there's no nut to fish into place. Slide the cabinet onto the dividers so it sits inside the lip of the end panel, then line up the bolts with the holes on the bottom and tighten them.
Step 6: Secure the top
Through the open top drawer space, run the two short bolts down through the shelf above, where they line up with existing holes in the cabinet. Secure each with a serrated lock nut. On a 16" deep shelf, only the front locations line up, so that's where these go.
Step 7: Reinstall the drawer
Slide the top drawer back in place, and you're done. Repeat for a second cabinet if you're running two side by side, like we are.
Tips
Install cabinets before the end panel goes on. We mounted both drawer units before installing the second end panel, which gives you room to work.
Other mounting locations. The manual also covers mounting the cabinet to the floor and other locations. Follow those instructions if that's your plan.
Stack for more storage. Weather Guard designed the module to stack, so you can build a custom storage setup.
Shop the Weather Guard 3-Drawer Secure Storage Module
Need more drawers? Check out the Weather Guard 2-piece, 5-drawer Secure Storage Module Kit, or browse all van shelving.
FAQ
How far apart should my shelves be for the 3-drawer cabinet?
Leave a 9-hole gap, counting the hole with the lower shelf's bolt head. The printed manual says 8, but that doesn't leave enough room.
Can I mount the bottom shelf upside down?
Not with this cabinet. Mounting the shelf upside down without spacers doesn't leave enough room for the cabinet. Keep the bottom shelf flanges up.
Do I need to remove a drawer to install it?
Yes, the top drawer. That gives you access to bolt the cabinet to the shelf above. Bend the slide pins in opposite directions to pull it out.
Are the mounting holes threaded?
Yes. The six holes on the bottom of the cabinet are pre-threaded, so you don't need nuts there.
Do the drawers stay closed while driving?
Each drawer securely latches closed, even when the cabinet is unlocked.
We want you empowered to make your own upfitting decision. If you'd rather talk it through, our US-based upfit pros are ready to help.
Products Used On This Upfit
-
Weather Guard Secure Storage Module, 3-Drawer | 903-3-01
Regular price $425.00Regular priceUnit price per$425.00Sale price $425.00check_box 100+ in stock. Ships in 1 business day.